Steps
The Steps page shows the information related to Steps of the Data masking plan and its Jobs.
| Table of contents |
|---|
| Steps |
| Register step |
| Edit step |
| Delete step |
| Reorder steps |
| Jobs |
| Register job |
| Edit job |
| Delete job |
| View job details |
Steps
Masking can be done in several stages in predefined order. Those ordered stages are called Steps. They contain Jobs that define masking activities. Masking process (Masking Plan) can consist of one or more Steps, but at least one is required.
All steps and their order are visible in the Step list. Details about the selected Step are displayed in the Details section:
- Name - name of the selected Step
- Note - description (if it exists) of the selected Step
- Status - status of the selected Step (see Register step for details about statuses)
- Run condition - run condition of the selected Step (see Register step for details about run conditions)
- Parallel factor - parallel factor of the selected Step (see Register step for details about parallel factor)
All Jobs of the selected Step are displayed in the Jobs overview table.
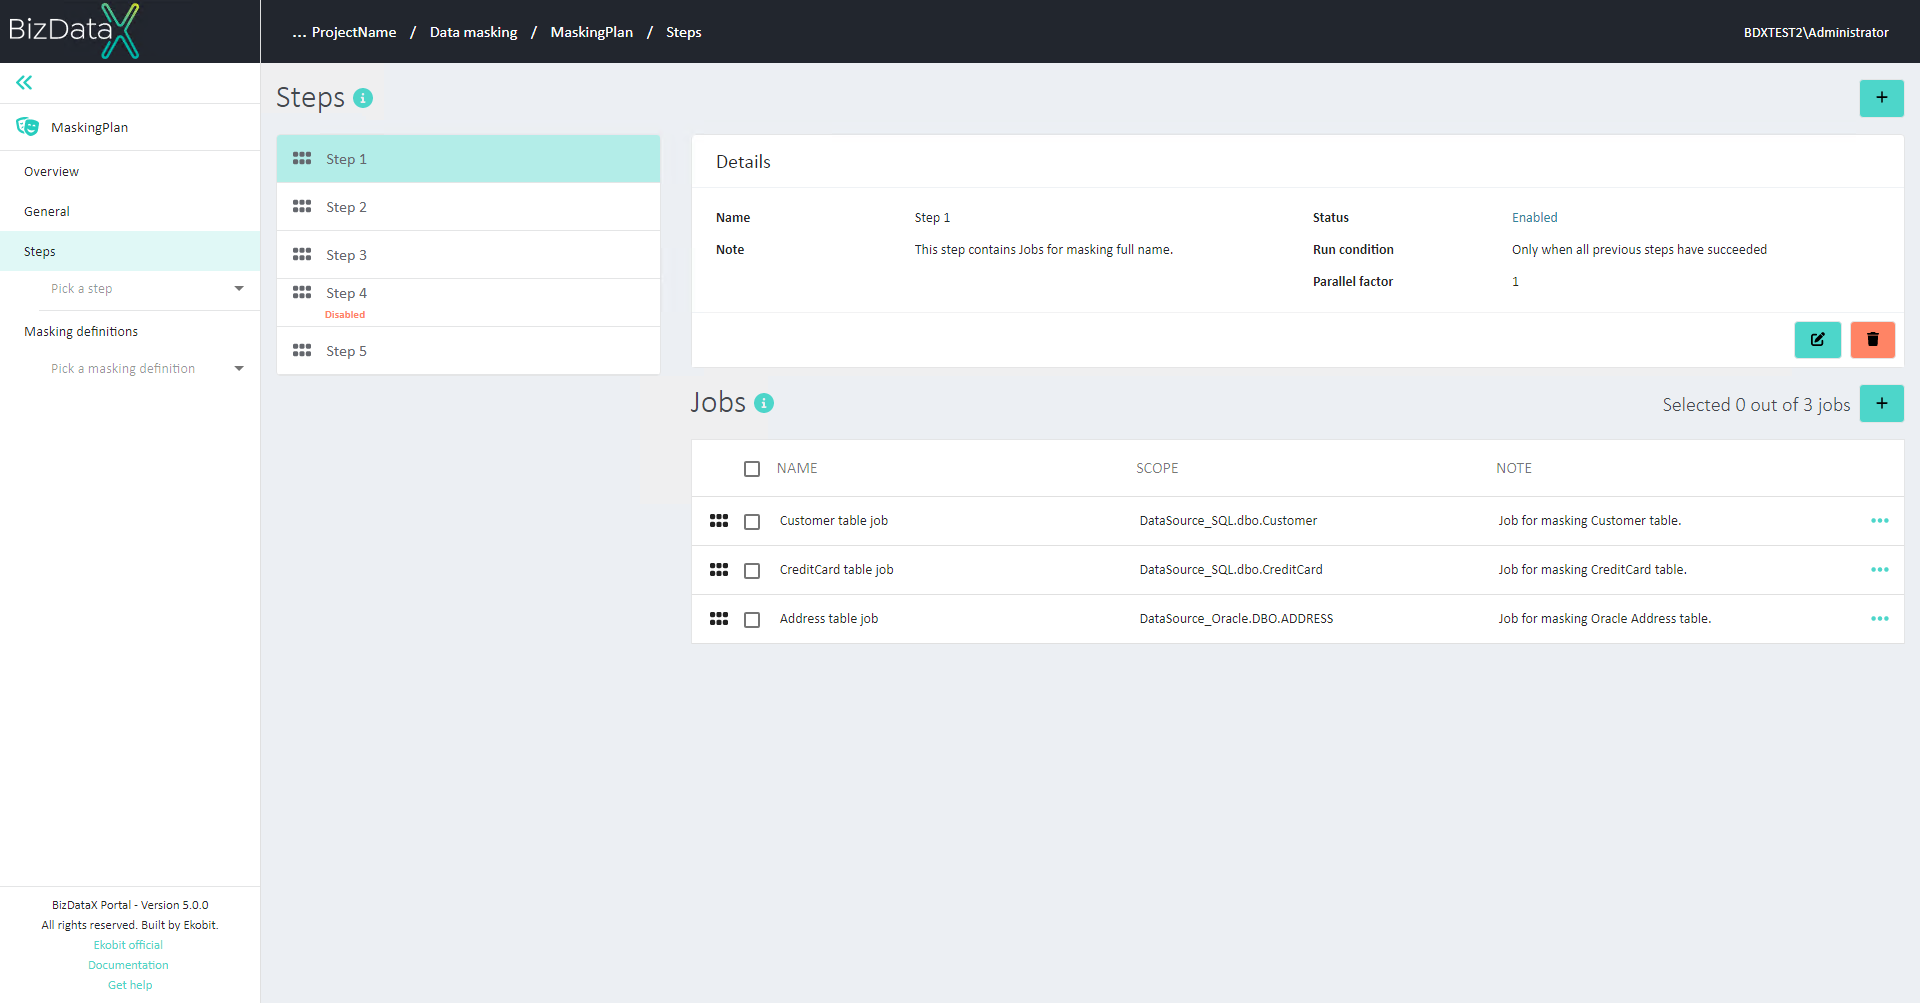 Figure 1: Steps
Register step
One Step is automatically created upon creating Data masking plan. To register new Step, select Register step button. New pop-up is displayed. It allows entering the information about the new Step:
Name - name of the Step
Note - description of the Step
Status - status of the Step. Options are:
Enabled - step can be executed according to its run condition
Disabled - step won't be executed.
Run condition - run condition of the Step. Options are:
Only when previous step has succeeded - step is the first one or previous step has succeeded or was skipped,
Only when all previous steps have succeeded - step is the first one or all previous steps have succeeded or were skipped,
Only when previous step has failed - step is the first one or previous step has failed,
Only when all previous steps have failed - - step is the first one or all previous steps have failed,
Run always (ignore errors) - runs no matter the status of the previous step,
Custom - user can specify more complex conditions
Parallel factor - parallel factor of the Step. It determines how many jobs in one step are processed in parallel. Default value is 1. Minimum value is 1 and maximum value is 100.
Selecting Confirm button confirms creating the Step. The system will automatically close the pop-up.
To cancel the process of creating a new Step, click on the Cancel button. The system will automatically close the pop-up.
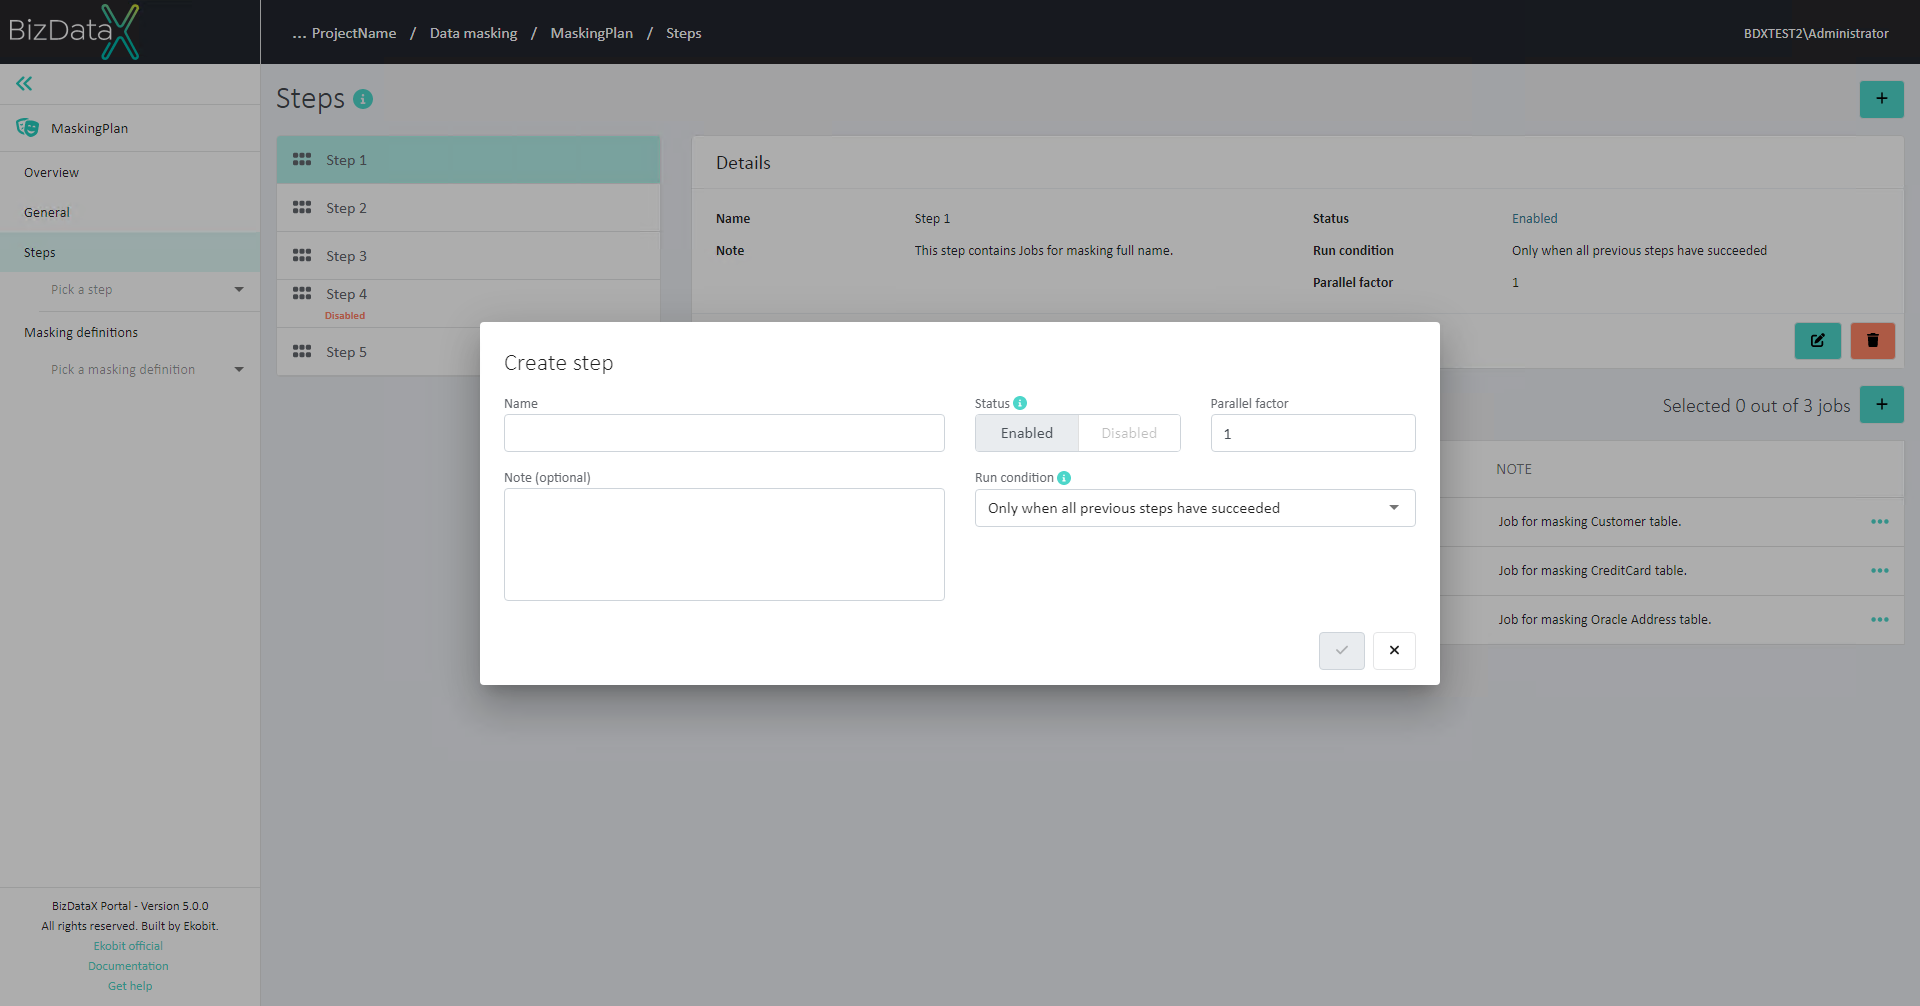 Figure 2: Register Step
Edit step
Once the Step is registered, all information can still be edited. Choose on Edit step in the Details section and the pop-up will be displayed. In the Edit context, all fields are editable.
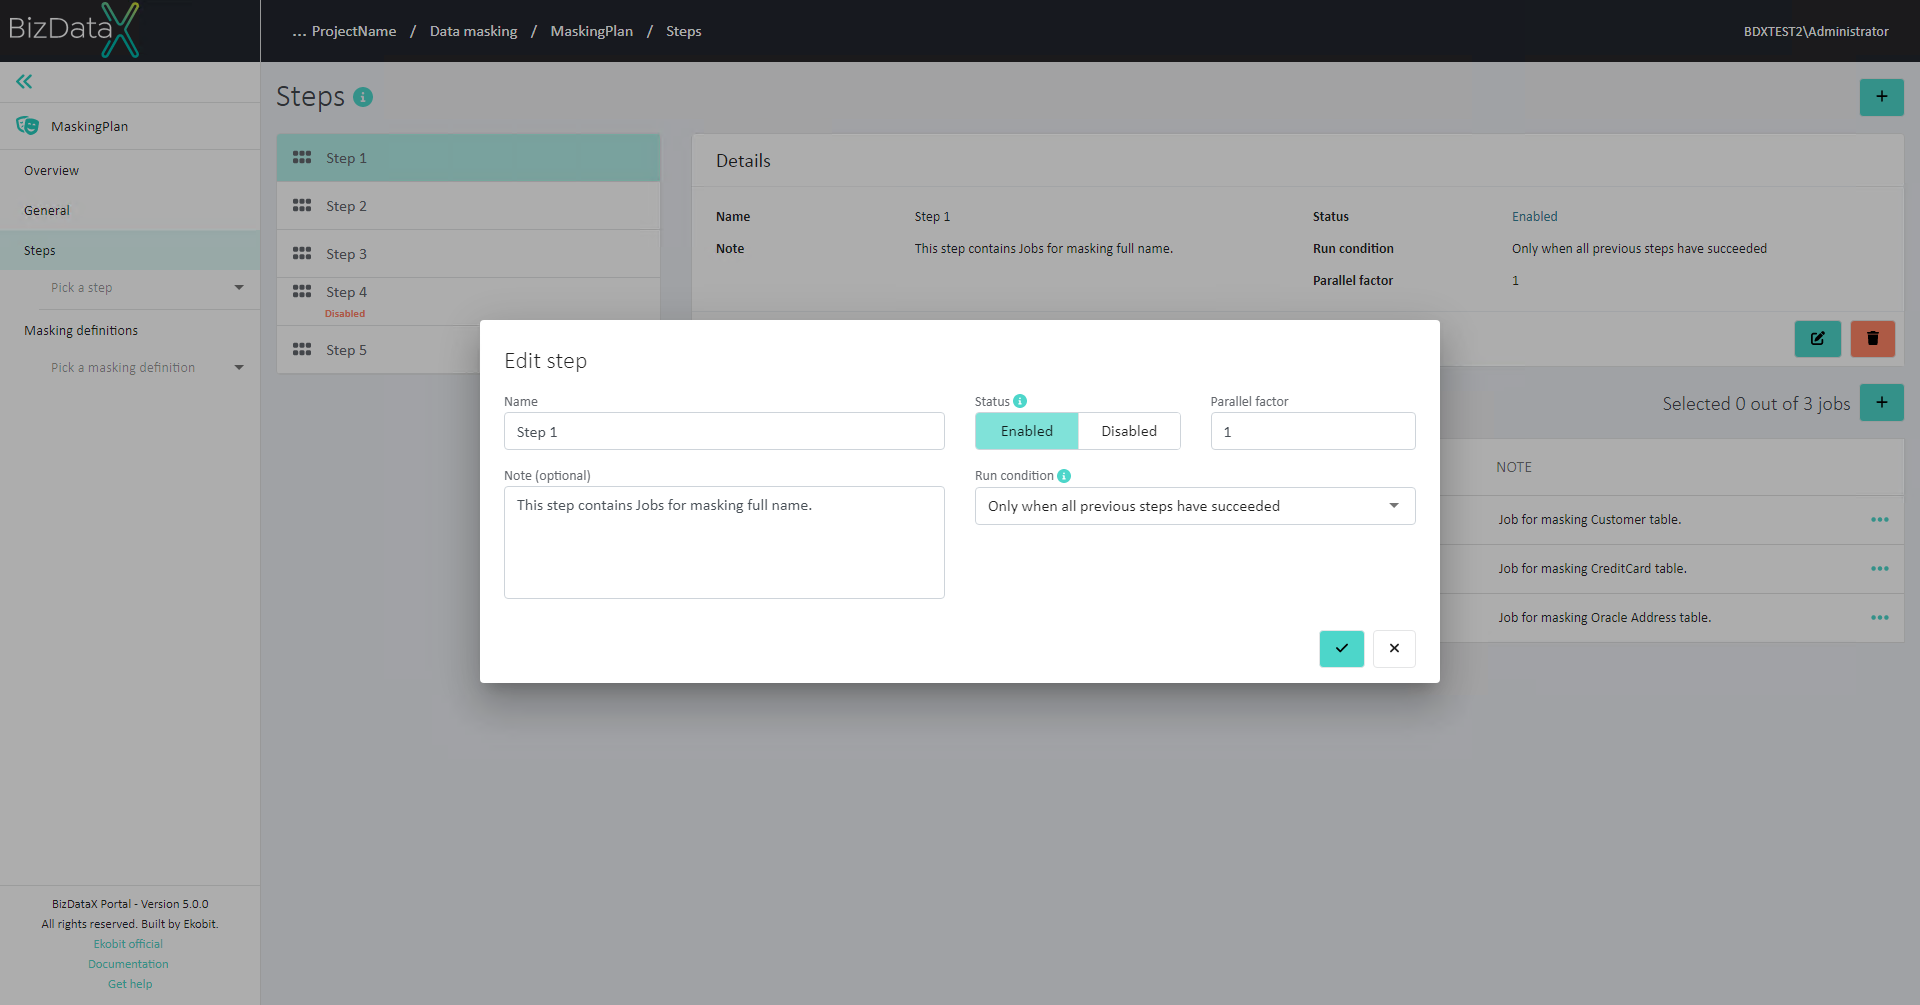 Figure 3: Edit Step
Delete step
Registered Steps can be deleted by selecting 'Delete Step' in the Details section. The delete Step confirmation dialog will be displayed, and Step will be permanently deleted after confirming the dialog.
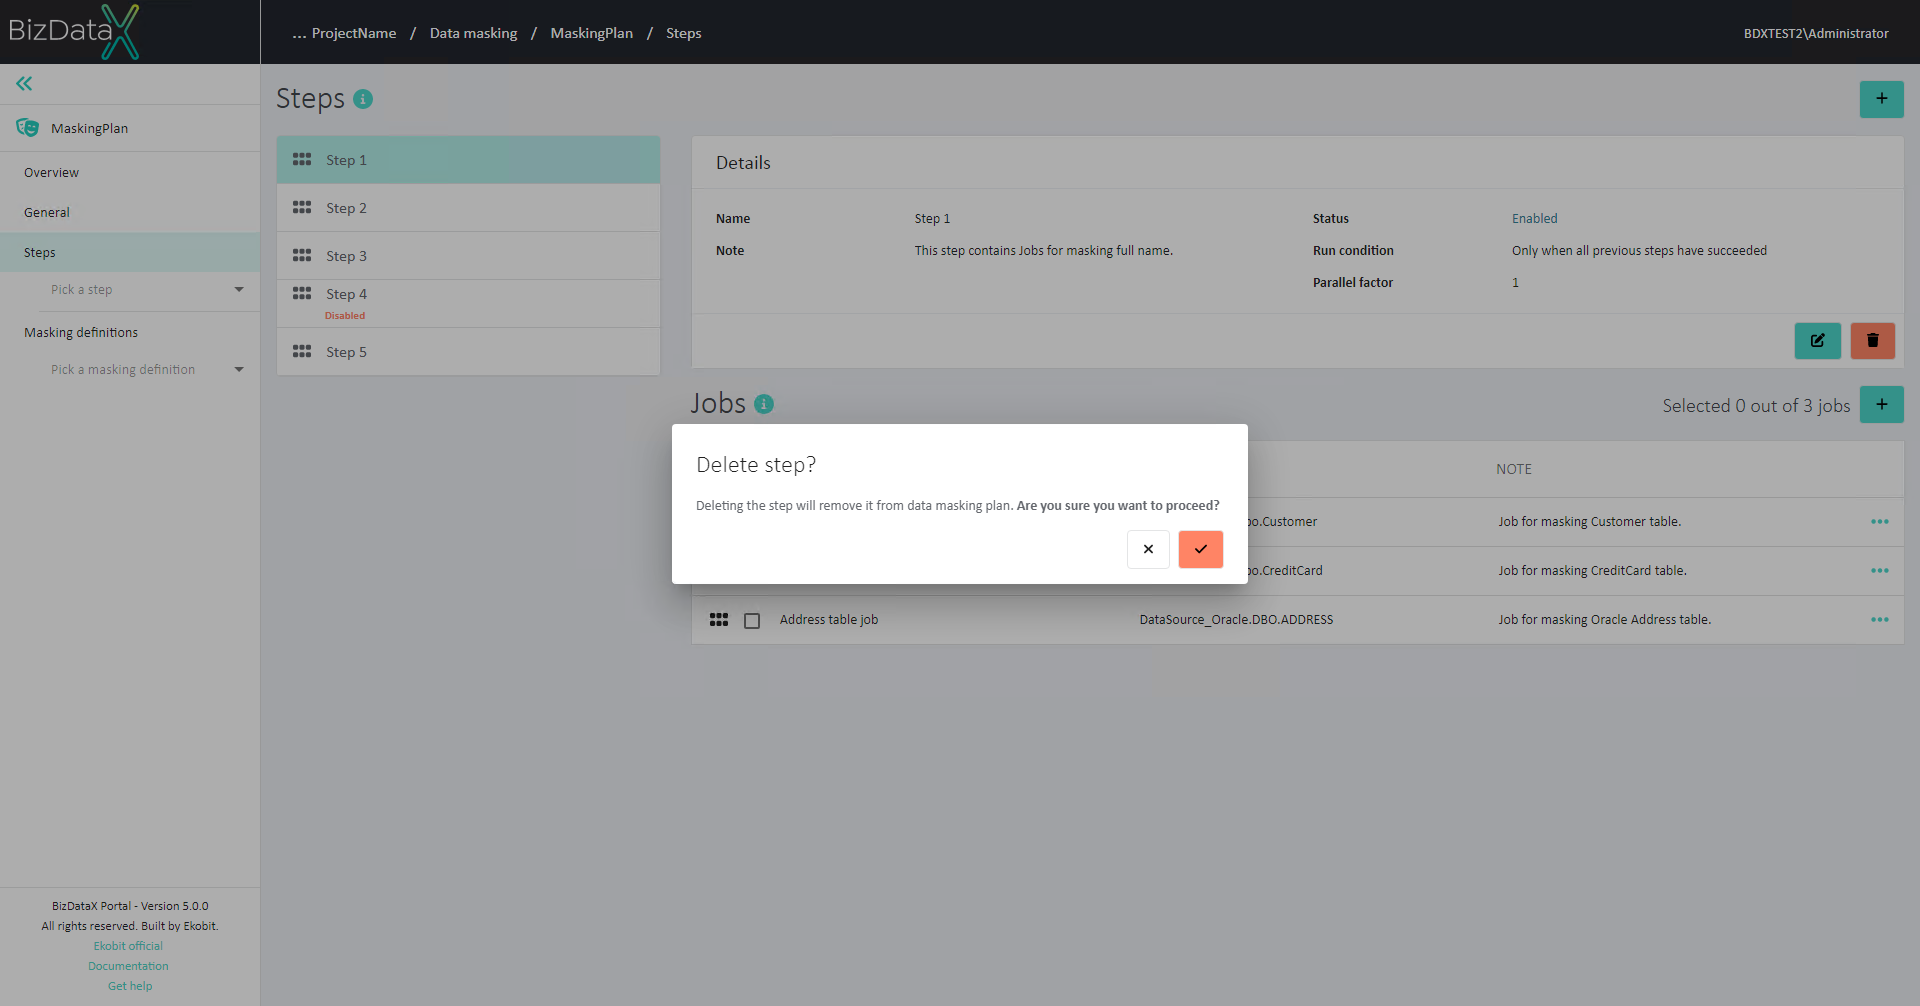 Figure 4: Delete Step
Reorder steps
Steps will be executed in a certain order, based on their place on list. Order of Steps in the list can be changed by using drag & drop method.
Jobs
Jobs represent masking activities inside Step. They are performed in specific predefined order. Activities include table jobs and script jobs. Each step can have one or more jobs, but at least one is required.
All Jobs of the selected Step and their order are visible in the Jobs overview table. Details about the Job are displayed in the table:
Name - unique name of the Job
Scope - data source, schema and table of the Job
Note - description of the Job
On table menu there are options to:
Jobs will be executed in a certain order, based on their place on list. Order of Jobs in the list can be changed by using drag & drop method.
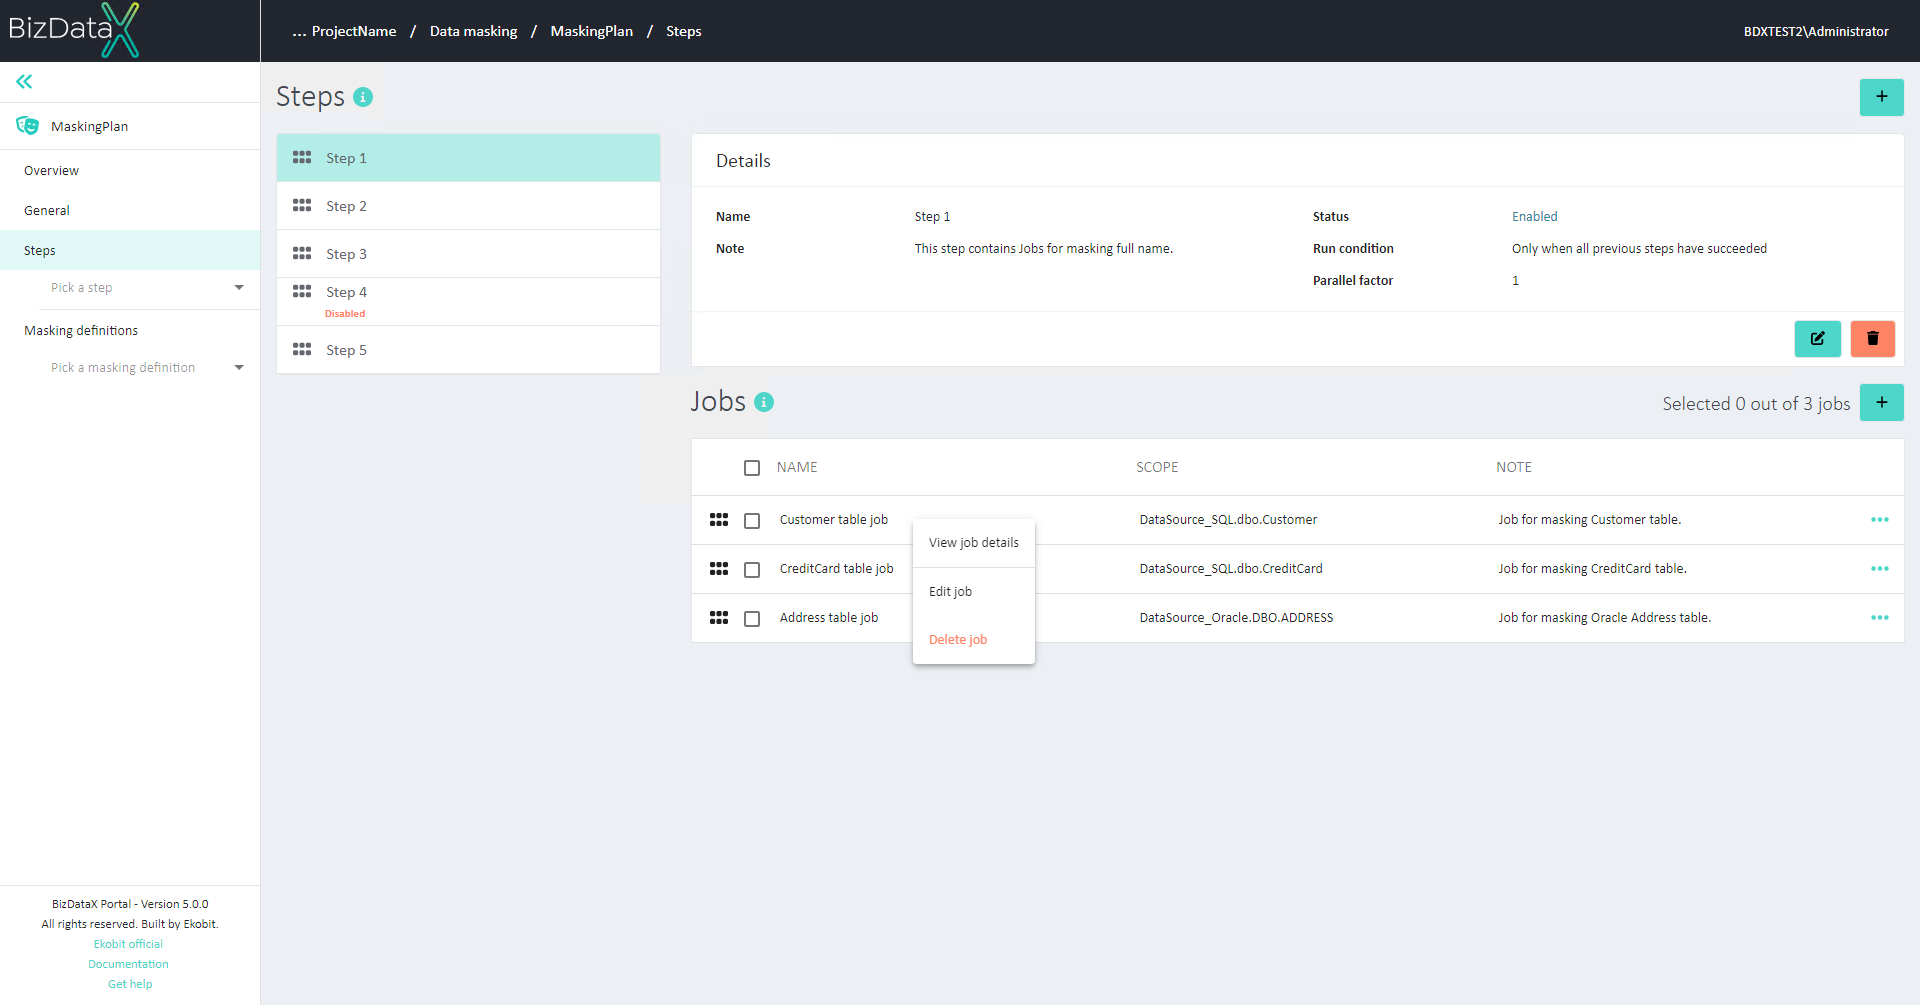 Figure 5: Jobs overview table
Register Job
To register new Job, select Register job button. New pop-up is displayed. It allows entering the information about the new Job:
Name - name of the Job
Note - description of the Job
Data source - information which Data source contains data that is going to be masked in that Job
Schema - information which Schema contains data that is going to be masked in that Job
Table - information which Table contains data that is going to be masked in that Job
Additional field is displayed if Advanced view is turned on:
- Settings - optional field for inputting JSON. It is used for custom advanced configuration of masking process.
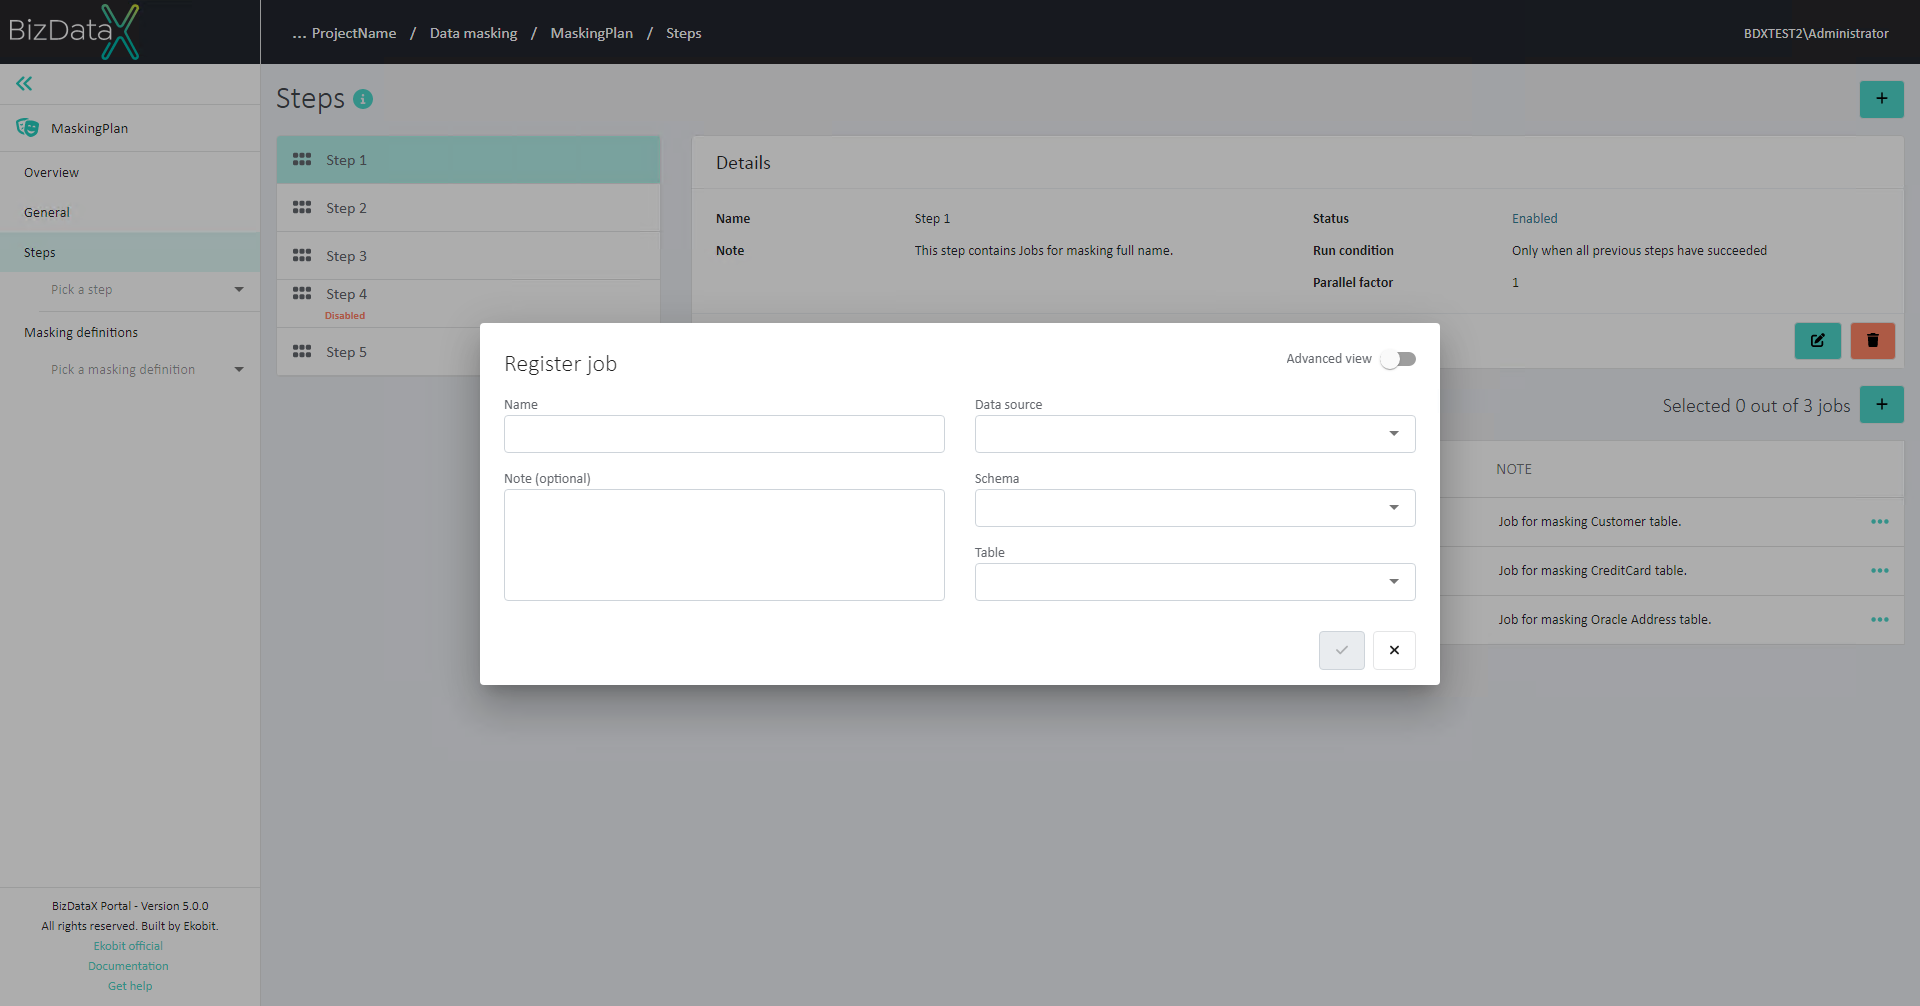 Figure 6: Register Job
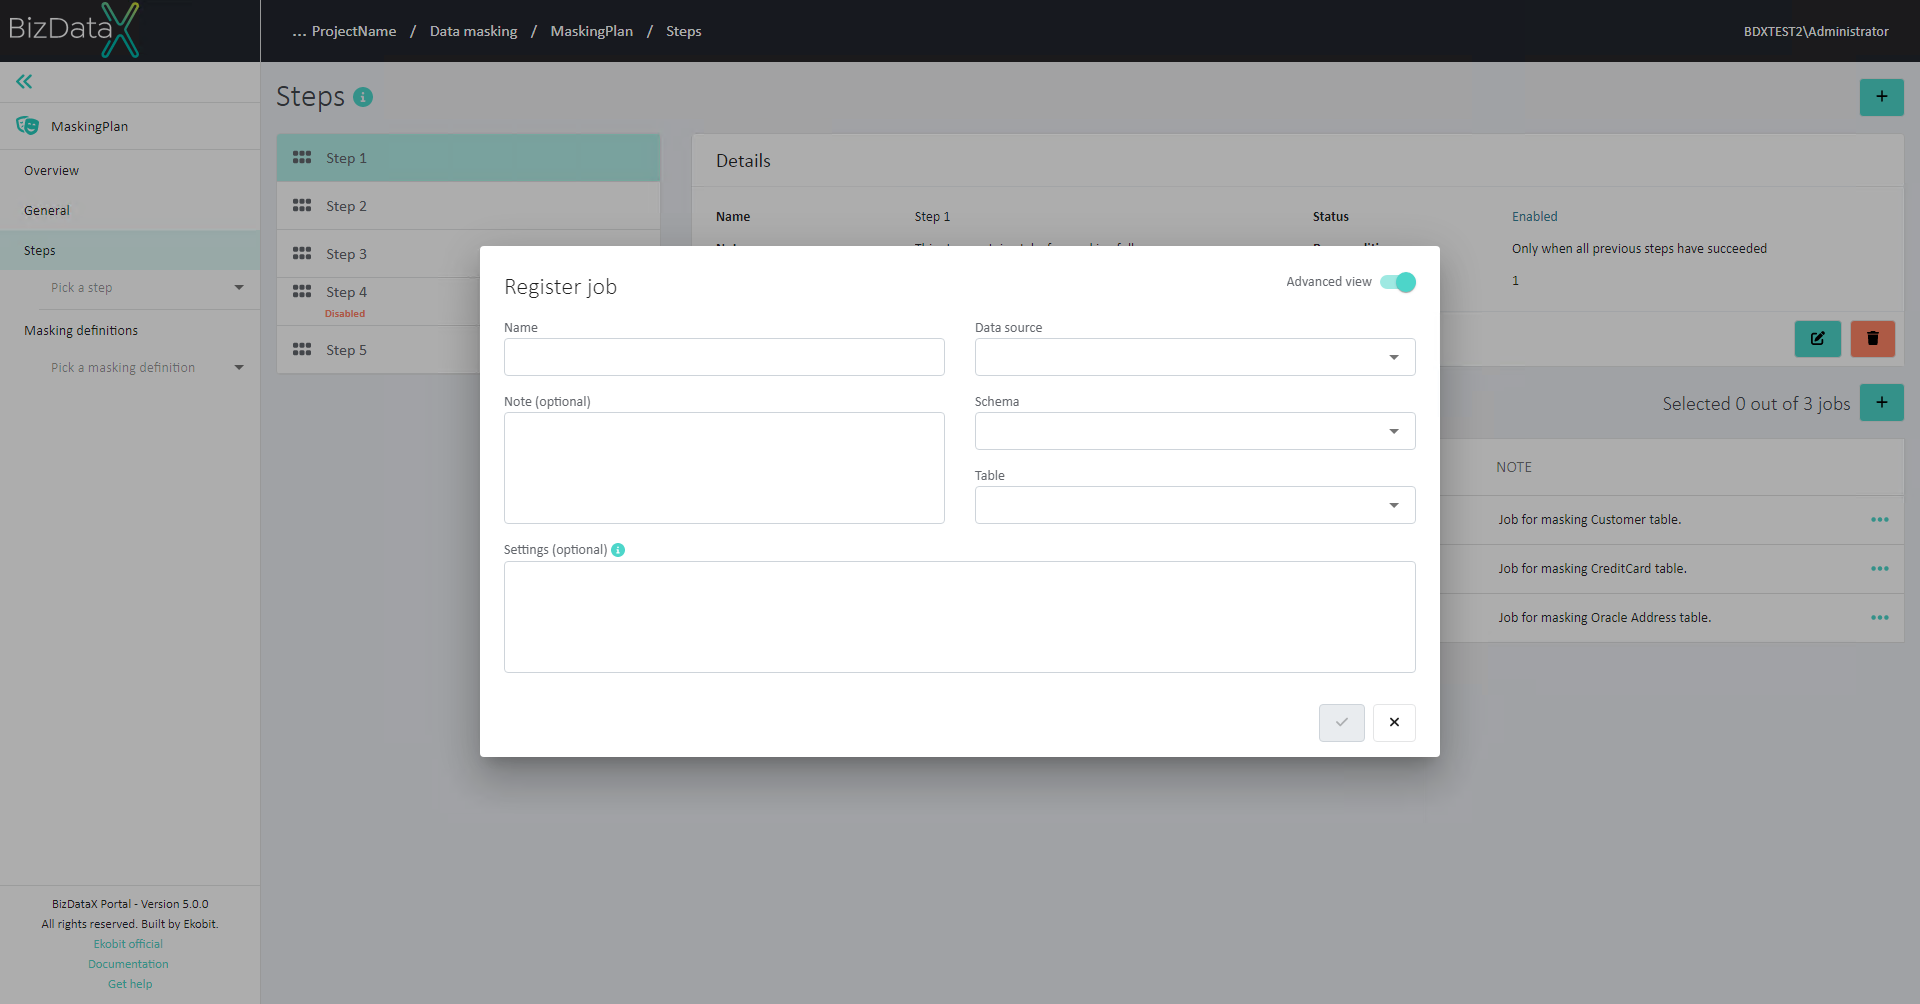 Figure 7: Register Job - Advanced view
Edit Job
Once the Job is registered, Name, Note and Settings of the Job can still be edited. Choose on Edit job in the Details section and the pop-up will be displayed.
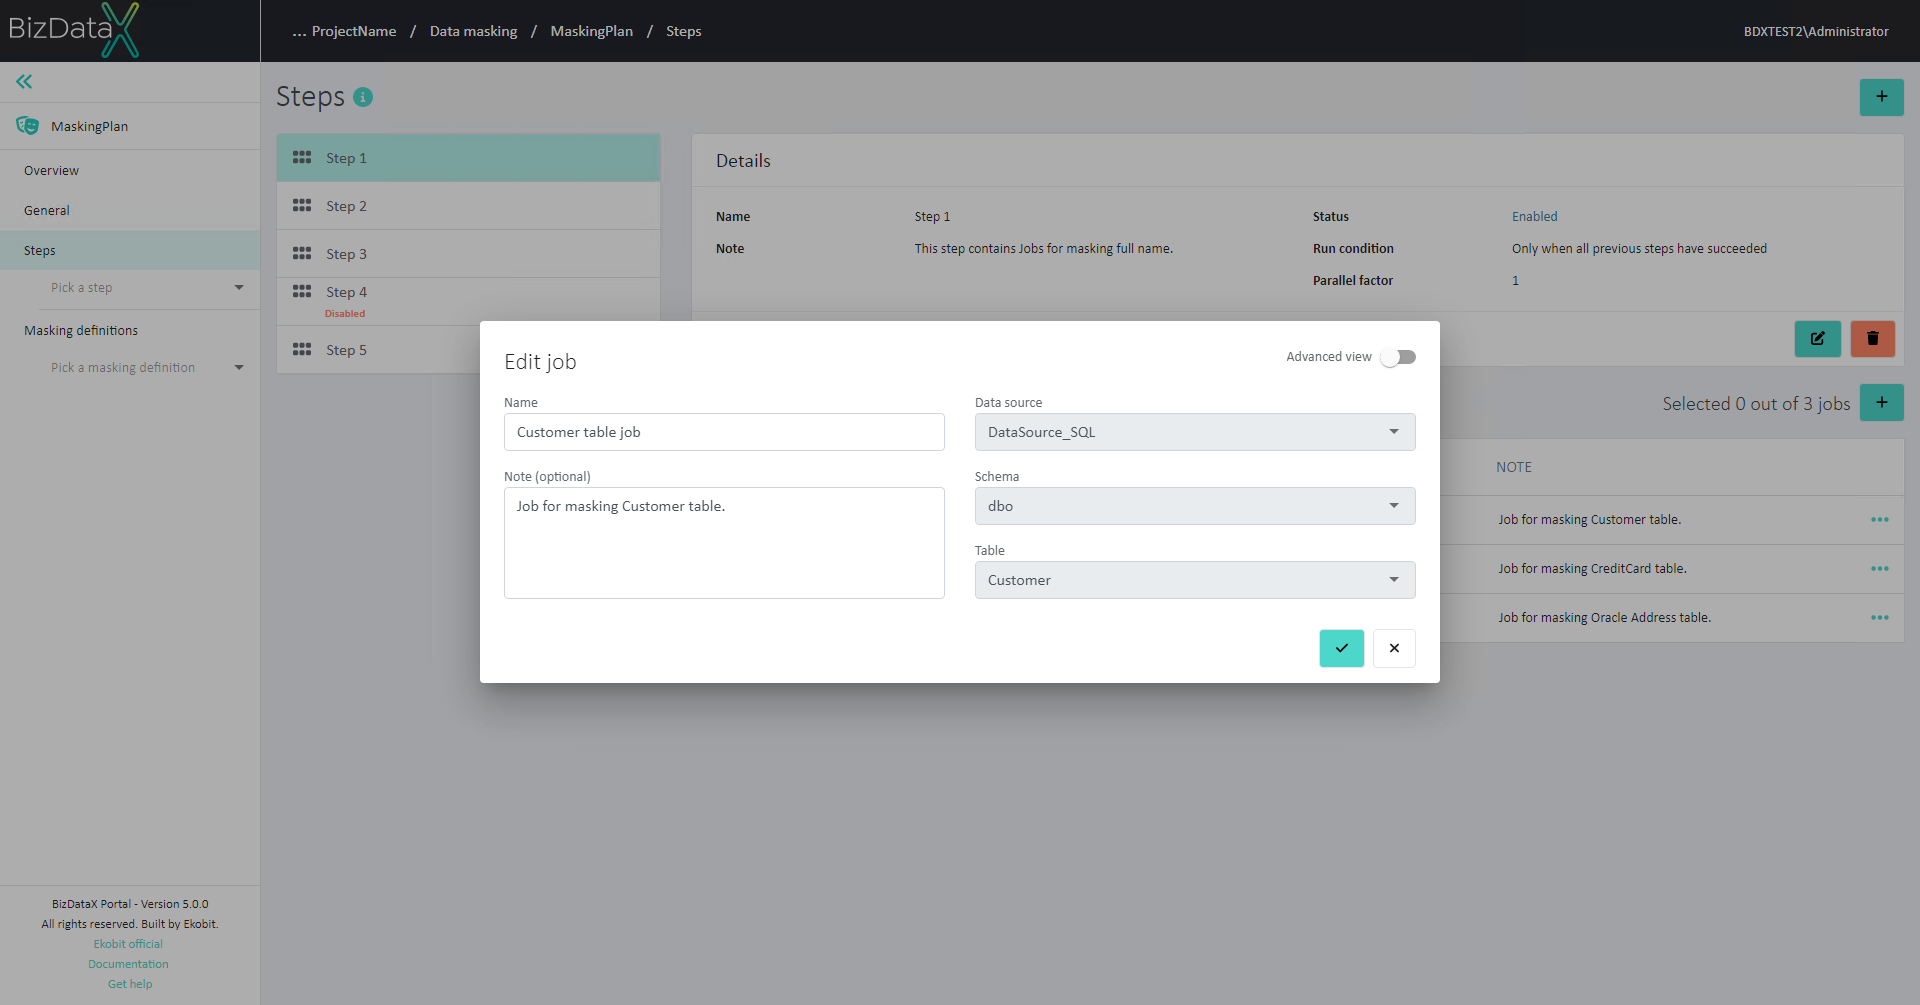 Figure 8: Edit Job
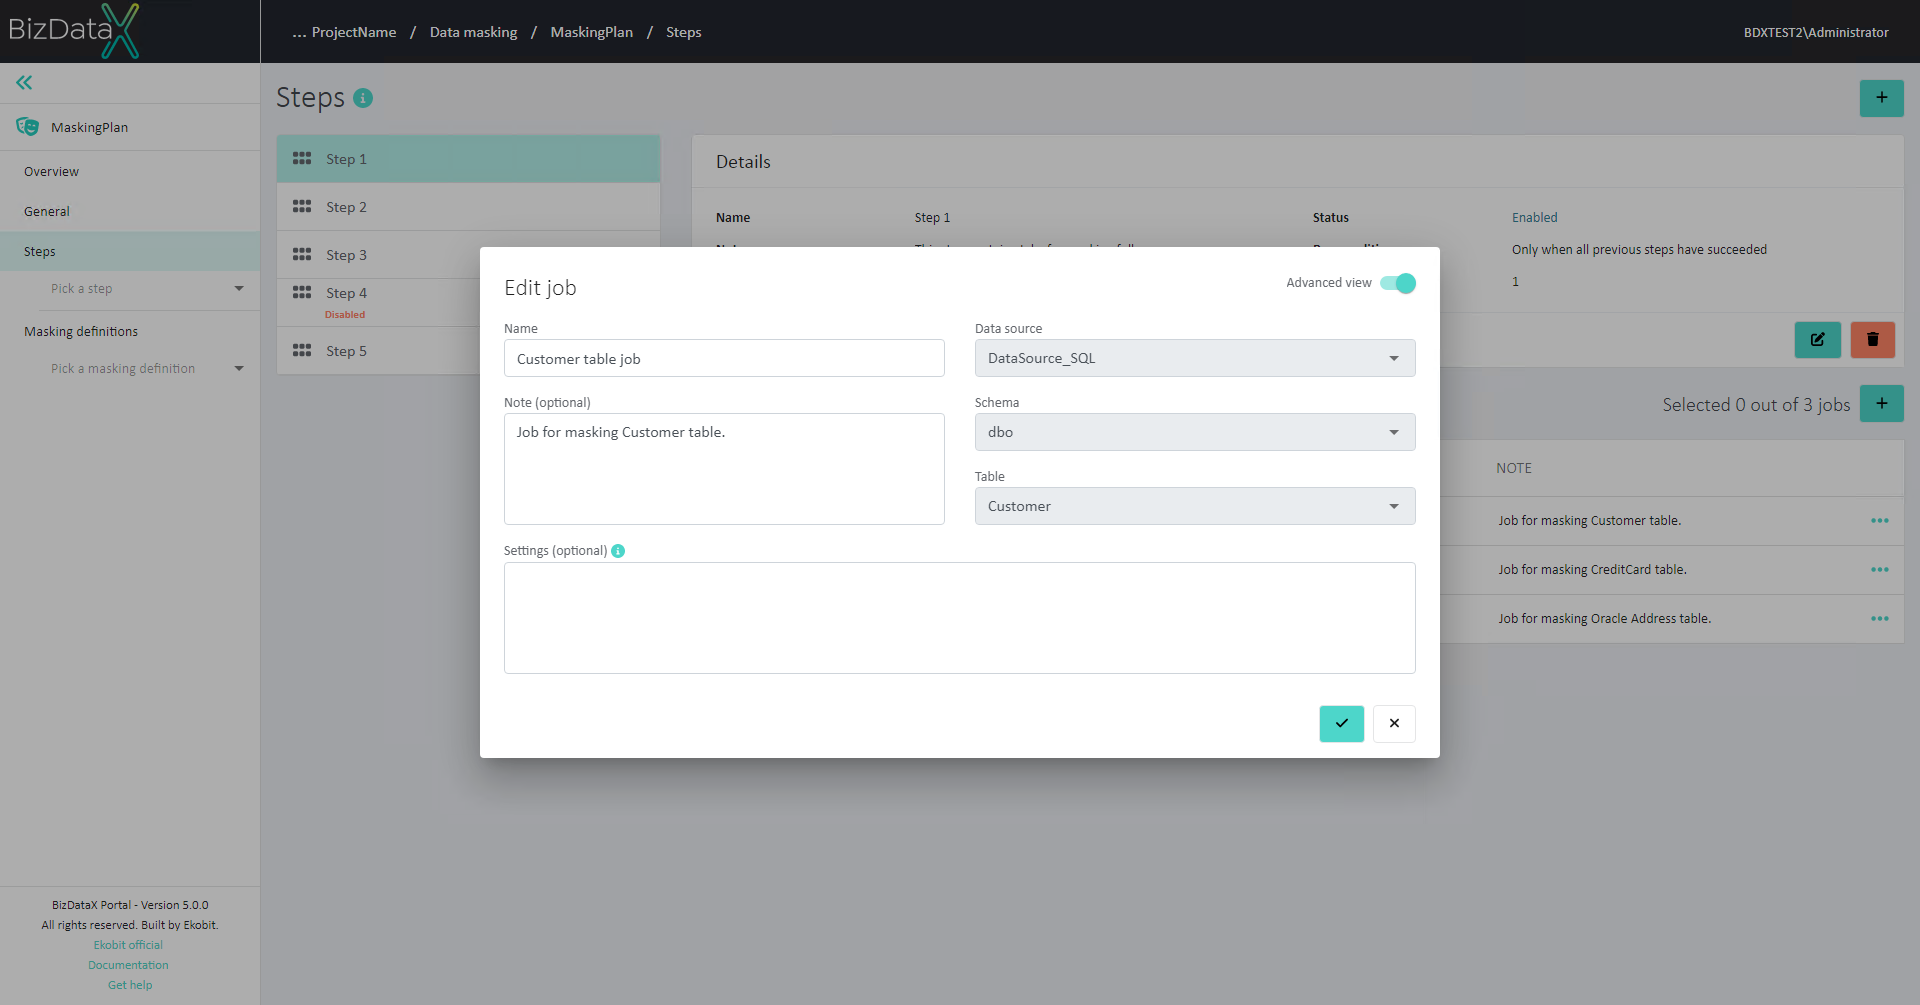 Figure 9: Edit Job - Advanced view
Delete Job
Registered Jobs can be deleted by selecting 'Delete job' in the Details section. The delete Job confirmation dialog will be displayed, and Job will be permanently deleted after confirming the dialog.
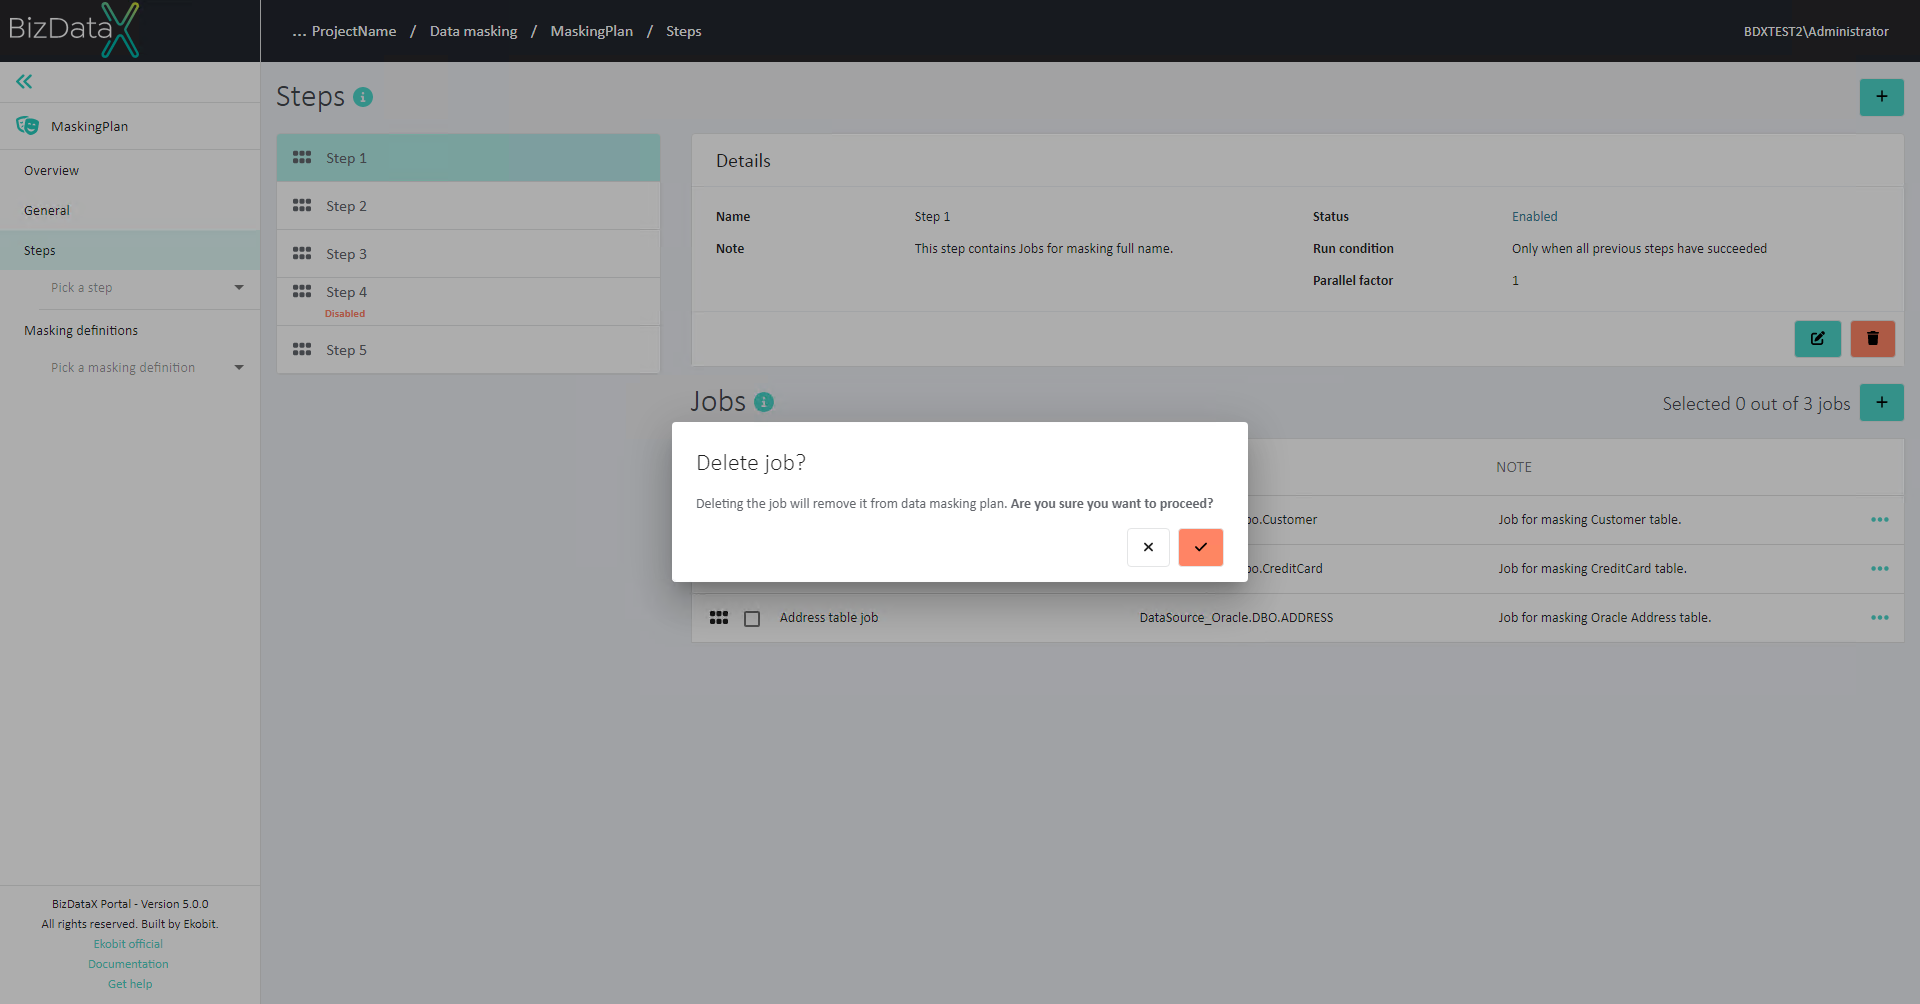 Figure 10: Delete Job
View Job details
For every created Job, which is displayed in Jobs Overview table, Job details, all its created Masking tasks and Assignments can be viewed through option 'View job details' in the context menu.